The board has the following components,
1. SoC – BCM2835 Broadcom, which is of ARM1176JZFS with floating point. Running at 700 Mhz and it could be over clocked to 800 Mhz but could behave crazy ( I did not test over clocking yet).
2. 512 MB SDRAM Model B , an earlier model A has 256 MB SDRAM, but I will be focusing on Model B since I have model B with me.
3. Power – 5V, 700 mA – it uses a micro usb charging outlet which is really convenient since I have mobile chargers that meet the needs of power supply. So there is no worrying about having to buy a power adapter even though RPi does not get shipped with a power adapter or anything else ( just the board ).
4. It has a 2 USB ports, one Ethernet port, HDMI, the old S-video RS out to connect to a TV like the good old days when we connected our video games to the TV set. it has a 3.5 mm jack for audio out and also through HDMI.
5. keyboad and mouse could be connected via USB.
So those were the essential things that I wanted to say about RPi.
oh yes here are some links for data sheets, os distro, guide.
1. BCM2835 – datasheet
2. ARM1176JZFS – TRM
3. Raspbian – wheezy
4. connections – quickstart
Connecting and making the board to run:
Connecting the device could be done as shown in the link connections – quickstart above.
Download a distribution from the above link raspbian – wheezy, it would be a better idea to download wheezy and then lets see how to do a kernel compilation for RPi.
As of now I just have a 16 GB SD card and a power adapter thats it. need to get a usb keyboard and mouse.
So lets first look into how to prepare the SD card and put Raspbian into it.
there are lots of easy methods to format the SD card for RPi but i choose to do it manually rather than using a script provided by RPi guys.
Note: you are responsible for what you do from here on, I am only sharing what i did and I am in no way responsible for what you do. with that having understood lets see what i did.
I am using ubuntu 12.04 as host machine.
Step 1: Insert SD card, open a terminal and type
$ sudo fdisk -l
$ sudo fdisk /dev/sdb

Command (m for help): o

Building a new DOS disklabel with disk identifier 0x3fea1b5a.
Changes will remain in memory only, until you decide to write them.
After that, of course, the previous content won't be recoverable.

Warning: invalid flag 0x0000 of partition table 4 will be corrected by w(rite)
Step 3: Print card info
Command (m for help): p

Disk /dev/sdb: 15.9 GB, 15931539456 bytes
64 heads, 32 sectors/track, 15193 cylinders, total 31116288 sectors
Units = sectors of 1 * 512 = 512 bytes
Sector size (logical/physical): 512 bytes / 512 bytes
I/O size (minimum/optimal): 512 bytes / 512 bytes
Disk identifier: 0x57767721

   Device Boot      Start         End      Blocks   Id  System
Command (m for help): x
Now we want to set the geometry to 255 heads, 63 sectors and calculate
the number of cylinders required for the particular SD/MMC card:
Expert command (m for help): h
Number of heads (1-256, default 4): 255

Expert command (m for help): s
Number of sectors (1-63, default 62): 63
Warning: setting sector offset for DOS compatiblity
NOTE: Be especially careful in the next step. First calculate the number of cylinders as follows:
-
B = Card size in bytes (you got it before, in the second step when you printed the info out)
- C = Number of cylinders
C=B/255/63/512
1936.899346405 = 15931539456/255/63/512
Expert command (m for help): c
Number of cylinders (1-1048576, default 1011): 1936
In this case 16GB card is used (reported as 15931539456 bytes by fdisk above),thus 15931539456 / 255 / 63 / 512 = 1936.89934 rounded down to 1936 cylinders
and there are 255 heads, 63 sectors, 512 bytes per sector.
So far so good, now we want to create two partitions. One for the boot image, one for our distro.
Expert command (m for help): r
Command (m for help): n
Command action
  e   extended
  p   primary partition (1-4)
p
Partition number (1-4): 1
First cylinder (1-245, default 1): (press Enter)
Using default value 1
Last cylinder or +size or +sizeM or +sizeK (1-245, default 245): +50

Command (m for help): t
Selected partition 1
Hex code (type L to list codes): c
Changed system type of partition 1 to c (W95 FAT32 (LBA))

Command (m for help): a
Partition number (1-4): 1
Step 6: Create the Linux partition for the root file system.
Command (m for help): n
Command action
  e   extended
  p   primary partition (1-4)
p
Partition number (1-4): 2
First cylinder (52-245, default 52): (press Enter)
Using default value 52
Last cylinder or +size or +sizeM or +sizeK (52-245, default 245):(press Enter)
Using default value 245
Step 7: Print and save the new partition records.
Command (m for help): p

Disk /dev/sdb: 15.9 GB, 15931539456 bytes
255 heads, 63 sectors/track, 1936 cylinders, total 31116288 sectors
Units = sectors of 1 * 512 = 512 bytes
Sector size (logical/physical): 512 bytes / 512 bytes
I/O size (minimum/optimal): 512 bytes / 512 bytes
Disk identifier: 0x57767721

   Device Boot      Start         End      Blocks   Id  System
/dev/sdb1   *        2048        2098          25+   c  W95 FAT32 (LBA)
/dev/sdb2            2099    31116287    15557094+  83  Linux

Command (m for help): w
The partition table has been altered!

Calling ioctl() to re-read partition table.

WARNING: Re-reading the partition table failed with error 16: Device or resource busy.
The kernel still uses the old table. The new table will be used at the next reboot.

WARNING: If you have created or modified any DOS 6.x partitions, please see the fdisk
manual page for additional information.
Syncing disks.
Step 8: Now we’ve got both partitions, next step is formatting them.
NOTE: you should unplug the card and plug it back in. Linux will now be able to detect the new partitions.
$ sudo mkfs.msdos -F 32 /dev/sdb1 -n LABEL
mkfs.msdos 2.11 (29 oct 2011)

$ sudo mkfs.ext3 /dev/sdc2 -L root
mke2fs 1.42 (29-Nov-2011)
Filesystem label=root
OS type: Linux
Block size=4096 (log=2)
Fragment size=4096 (log=2)
Stride=0 blocks, Stripe width=0 blocks
972944 inodes, 3889273 blocks
194463 blocks (5.00%) reserved for the super user
First data block=0
Maximum filesystem blocks=3984588800
119 block groups
32768 blocks per group, 32768 fragments per group
8176 inodes per group
Superblock backups stored on blocks:
 32768, 98304, 163840, 229376, 294912, 819200, 884736, 1605632, 2654208

Allocating group tables: done
Writing inode tables: done
Creating journal (32768 blocks): done
Writing superblocks and filesystem accounting information: done
Step 9: now that the sd card is ready we need to flash the image file 2012-12-16-wheezy-raspbian.img which was extracted from the downloaded .zip file shown in the download links before starting the procedure,
if you have not yet done that please go ahead and do it.
So flashing can be done by using a dd command but it could damage your host OS if the location to flash is misunderstood with the host loaction. So i am using Image writer,
Image writer can be installed via apt-get or ubuntu software center
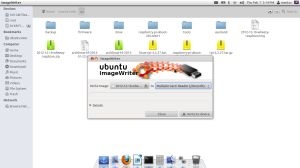
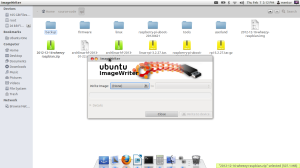
select the image .img file by navigating to it and select the sd card location as shown below.

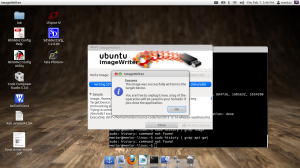
now if every thing goes good you should see this:

sd card is ready to be inserted into the RPi and ready to boot.
